Construction History - 01/15/02
| Home | October 2, 2001 | November 14, 2001 | January 15, 2002 |
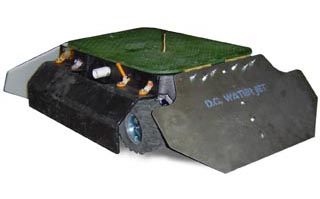
IRRIGATOR
Construction History - 01/15/02| Home | October 2, 2001 | November 14, 2001 | January 15, 2002 | |
IRRIGATOR |
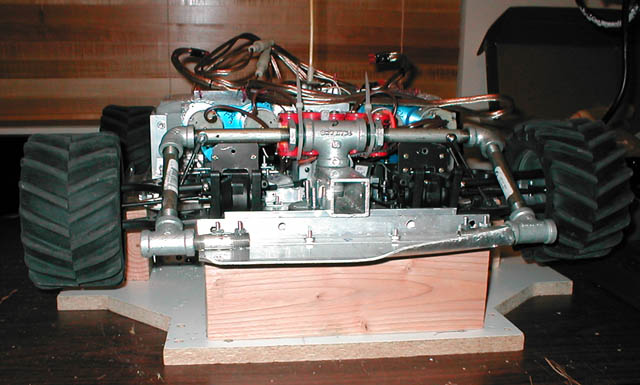
January 15, 2002 - Current weight: ~50 pounds.
Click the pictures to enlarge.
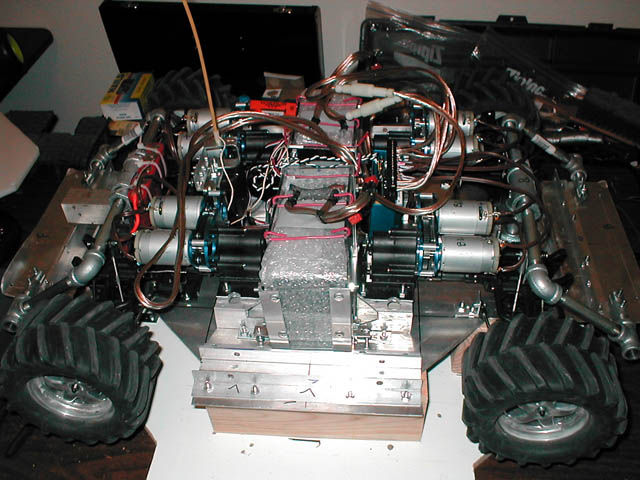
SETTLED ON .080" ALUMINUM CHASSIS- Using an aluminum chassis base instead of my original intent of sandwiching a piece of plastic HDPE between 2 sheets of aluminum. The single sheet of aluminum saved me some weight, but makes the chassis a bit weak, and subject to deformation from a solid hammer blow.
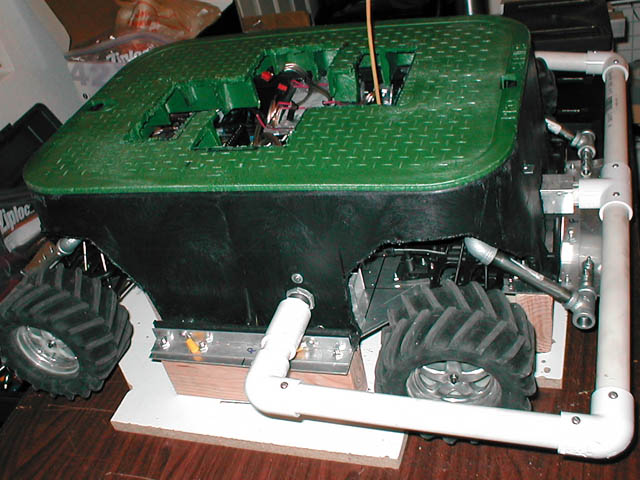
LOST THE FLIPPING ARM- I had to ditch the flipping mechanism because 1st, it put my robot over the weight limit of 60 pounds, and 2nd, the motors and gearing wasn't strong enough to turn myself back over if flipped. The whole intent of the flipping arm was for flipping myself back over if upsidedown.
DRIVEABILITY- I finally got to see the speed, power and maneuverability of the vehicle since I got the Vantec speed controller. RDFR23. It drives pretty much how I thought it would drive. Independently controlled car steering and tank style steering makes the vehicle very maneuverable and easy to control.
|

|
|
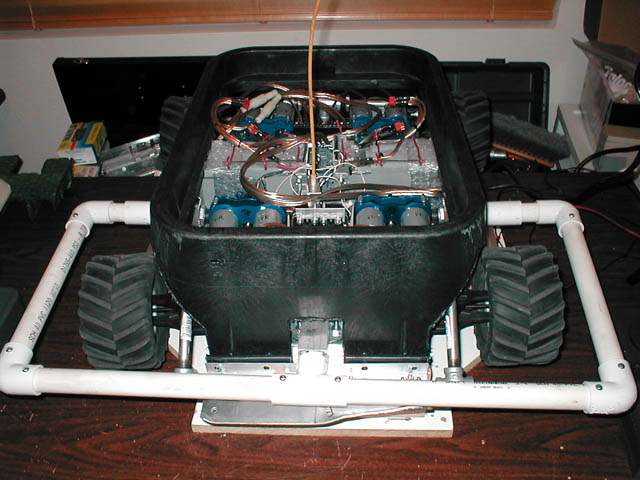 PVC bumper. Bumper will extend around the back of the vehicle as well. Tires are still very exposed. I'll have to do something about that. I'm hoping the flexibility of the PVC will help cushion blows from head on collisions.
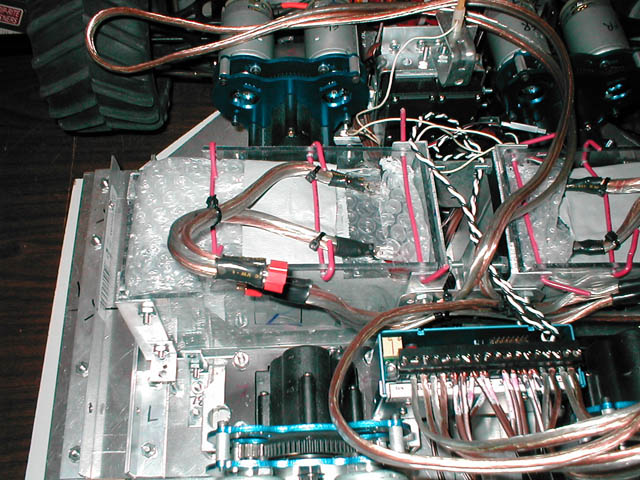
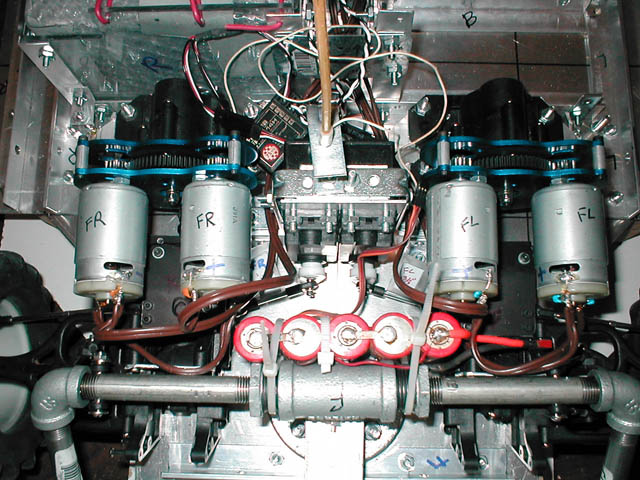
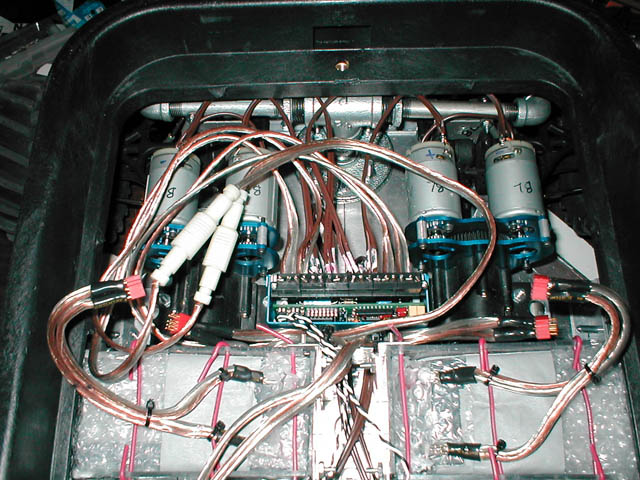 Rear motors and Vantec RDFR23 speed controller. This controller allows you to have the tank style steering. When you turn the stick to the left or right, the speed controller controls how much one side will slow down to control the amount of steering. Its a pretty cool setup. Only thing I don't really like about the speed controller is that a stick at neutral puts on the brakes. It doesn't coast when I release the throttle, it comes to a screeching halt instead. Oh well, different from driving RC cars, but its manageable. Battery wires are twin 12 gauge speaker wire per terminal. Battery connectors (red) are 2 Deans 4 pin connectors. 2 inline fuses, 20 amp each in white. For now fuses stay in. For competition, those fuses will probably be replaced with a nice 2000 amp 4-40 screw. In my opinion, a burnt fuse is a sorry way to be defeated. Although not shown in this picture, I purchased 2 more steering servos that will go right under the mess of wires between the motors.
 Notice how the PVC bumper doesn't really do a good job at protecting the tires. Its bit too high. Need solution.
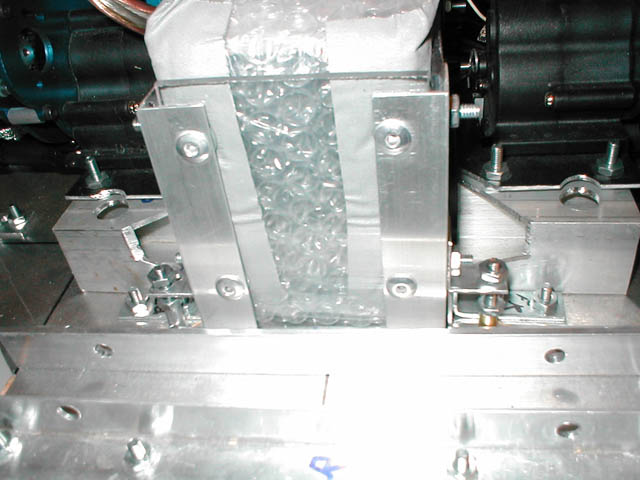
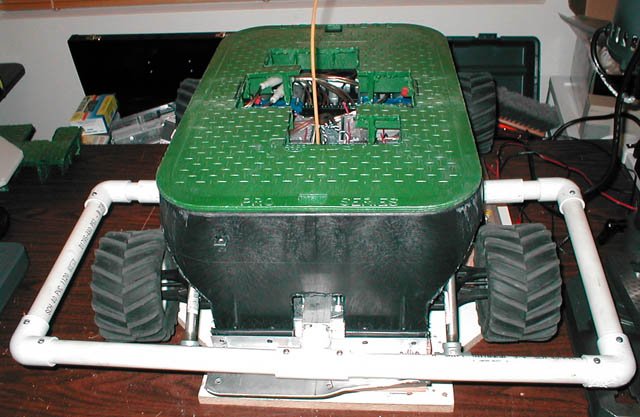 The cut out in the top of the green cover was where the flipping mechanism would have sat.
| IRRIGATION COVER ATTACHMENT- The following 3 pictures illustrates how the irrigation box is attached to the chassis. A total of 8 of these steel pins hold the irrigation box cover to the chassis. This concept is based on the Traxxas EMAXX hinge pins. | ||
Angle aluminum used as guides to hold each edge of the irrigation box to the chassis. 1/4" diameter holes drilled in the angle aluminum. Its just below the "R". |
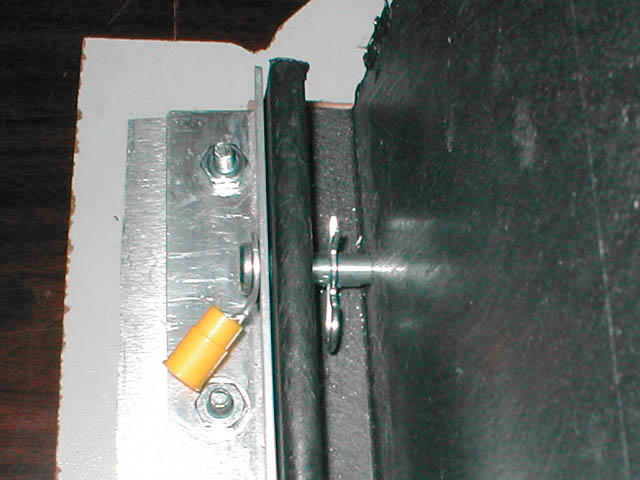
Holes also drilled through plastic irr. box. Holes in aluminum and irr. box line up. 1/4" diameter steel clevis pin slides through the holes. The yellow thing is a wire connector. I'm just using it as a handle to pull the pin back out. The clevis pin has holes drilled through them, so its perfect to use a body clip to keep the pin in place. |
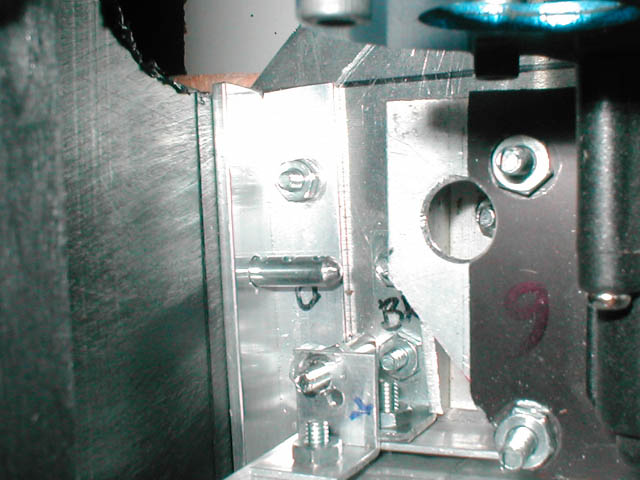
View from the inside. This end of the clevis pin end is normally blunt. I beveled and rounded the tip. This helped the pin go through the holes in case the holes aren't lined up perfectly. |
| BATTERY BOX DESIGN- Lexan bottom and walls with aluminum reinforcements. | ||
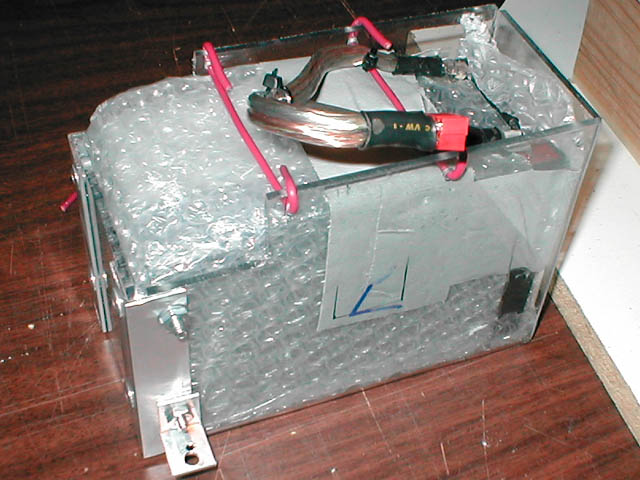
Battery box made from 1/8" lexan. Lexan heated and bent upwards 90 degrees to form the lexan box. Angle aluminum riveted and bolted to 2 sides of lexan box for support. Only did this to 2 sides. This allows me to spread open up the non-supported edges to help get the battery out. Red house wire used to keep the battery from accidentally sliding out too. |
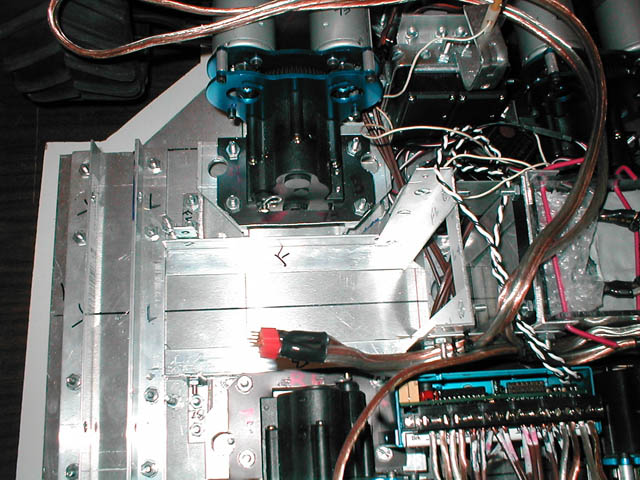
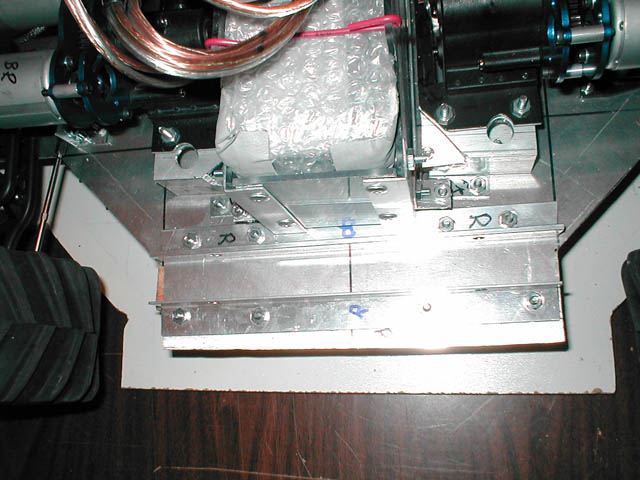
The other 2 supports for the box are on the vehicle as shown in this picture. Vertical angle aluminum. The angle aluminum running left to right across the chassis ("F" written on one of them) holds the battery in place. However, those pieces give the chassis good support from end to end, and prevents the center of the chassis from sagging. |
Battery box secured in the vehicle. |
 On the sides of the lower rivets of the battery box are 2 short pieces of angle aluminum. Its more obvious in the above picture. This slides over a long bolt protruding up from the chassis and is secured with a nut. This design is intended to hold the battery box down to the chassis.
 The black tie wraps around the battery wire and house wire (red) is intended to help keep the battery wire connector from pulling off from the battery. So far, its a bad design because yesterday I found one connector half way off. The tie wrap could slide back and forth along the the red house wire and could work the connector off.
 I was driving on the road coming up to my driveway at maybe 25% of top speed. Slow. I had a small impact with that lip in the driveway and it kicked up that one corner of the chassis. Sheesh. I didn't think such a small impact could bend the chassis that badly.
 Locking into 1st gear. The EMAXX tranny has a 2 speed transmission. I locked it into 1st gear by slotting the metal shaft with my dremel and adding that body clip. The body clip prevents the shaft from sliding back into the tranny and engaging 2nd gear. And the slot keeps the body clip from just sliding off the back of the shaft. I also had to slice off a good portion of the shaft as shown here to provide enough clearance for the batteries.
 Front end of vehicle. Two quarter scale servos create car style steering. 5 cell 1400 mah receiver battery. Need large cells to power the large servos. Receiver thrown into the heap of wires. The wires are not intended to serve as a shock absorber for the receiver, although it may look like it.
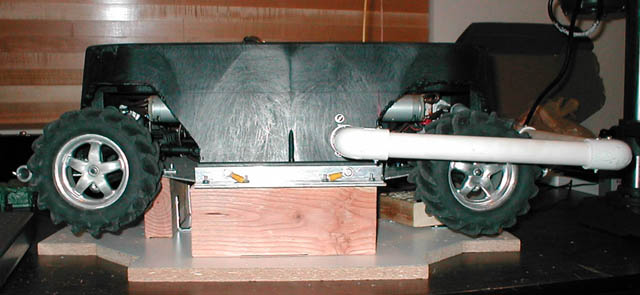
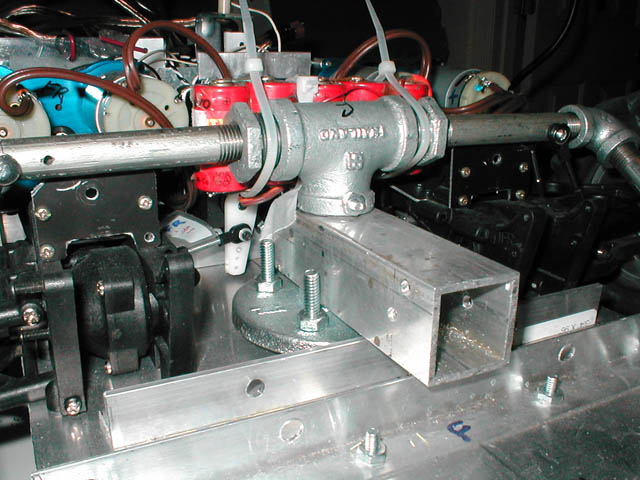 This 1.25" aluminum square tubing attached to this 1/2" galvanized steel pipe is intended to take the brunt of head on collisions. Hoping it will hold up.
Issues:
Protect arms from saws. Protect wheels from impacts. Weight! I helped the weight situation by eliminating the flipping mechanism (I'm sad), and only using a single piece aluminum chassis. However, what you see here in the pictures still weigh 50 pounds. Only have 10 pounds to play with. I like to say a conservative 7 pounds to play with. Remaining big ticket items to be purchased: FM/PCM radio system, battery charger, 4 more gel cell batteries, aluminum arms, maybe aluminum rims.